How to Set Parallax on Rifle Scope for Accurate Shots: Complete Step-by-Step Guide
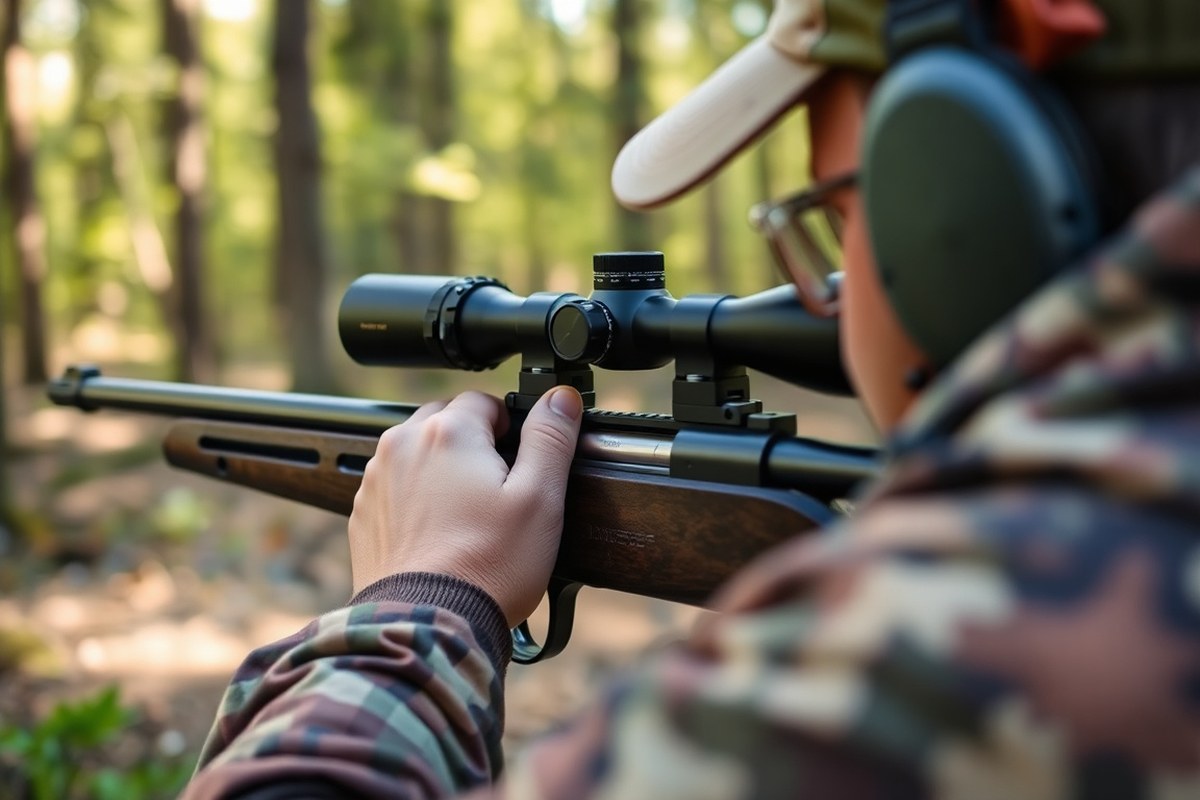
To set parallax on a rifle scope, adjust the focus until the reticle and target stay aligned when you move your head slightly. This ensures your point of impact stays consistent, improving accuracy at various distances. Understanding how to set parallax on a rifle scope is essential for hunters and precision shooters aiming for reliable shot placement beyond close range.
This guide helps intermediate rifle shooters and hunters master parallax adjustment. You’ll learn the best distances to set parallax, differences between side focus and adjustable objective scopes, and how mounting and eye relief influence your setup.
Key Takeaways
- Set parallax free at 150 yards for most hunting rifles to minimize aiming errors at common shooting distances.
- Use side focus or adjustable objective adjustments depending on your scope type to fine-tune parallax at varying ranges.
- Adjust parallax so the reticle remains on target when shifting your eye position to avoid point-of-impact shifts.
- Eye relief of 3 to 4 inches helps maintain a full sight picture and reduces parallax-related aiming errors.
- Parallax error is usually negligible under 300 yards but becomes important at distances beyond 400 yards.
- Mount your scope with proper height and cantilever positioning to maintain consistent eye alignment and reduce parallax effects.
How to Set Parallax on a Rifle Scope Step-by-Step

Setting parallax on your rifle scope involves adjusting the parallax knob or the adjustable objective lens until the reticle and target image sit on the same focal plane. This step-by-step process will help you locate the adjustment on your scope, fine-tune it based on your target distance, and verify that parallax error is minimized for sharper, more accurate shooting.
Preparing Your Rifle and Scope for Adjustment
Start by placing your rifle on a stable rest or shooting bench to eliminate movement during adjustment. Position a clear target at a known distance, such as 100 yards, in an open, well-lit area. Perform a safety check to ensure the rifle is unloaded or pointed in a safe direction before making any changes.
Having a stable setup reduces jiggle that can make parallax correction difficult. Using a target with distinct features or markings helps you spot reticle movement during testing. Confirming your shooting environment is safe lets you focus fully on the fine-tuning process.
- Set the rifle firmly on a stable rest or bipod.
- Place a target at your chosen distance, ideally a consistent 100 yards or more.
- Ensure the rifle is unloaded or pointed safely before adjusting the scope.
- Adjust your scope magnification to a mid or higher setting (e.g., 10x to 14x) for clearer focus.
- Look through the scope and check that the initial image is reasonably sharp before starting parallax adjustment.
Adjusting Side Focus and Adjustable Objective Scopes
Locate the parallax adjustment, usually a knob on the left side of the scope for side focus models or a rotating ring on the front of the scope for adjustable objective (AO) types. The parallax knob often has yardage markings such as 50, 100, 200, 300, or infinity, providing a rough guide for adjustment.
Turn the knob or ring to match the approximate distance of your target. This moves internal lenses to align the target image with the reticle, reducing parallax error. Since the yardage numbers are approximations, you will fine-tune this by observing reticle stability at the target.
- Identify your scope’s parallax adjustment: left-side knob for side focus or front ring for AO scopes.
- Set the parallax adjustment to the marked distance closest to your target range (e.g., 100 yards for a 100-yard target).
- Look through the scope and slowly rotate the knob or ring to reduce any shifting of the reticle against the target.
- Adjust in small increments until the reticle appears fixed on the target even as you move your head slightly.
- Note that for side focus scopes, the knob is convenient to reach without breaking cheek weld, making on-the-fly changes easier.
Testing and Confirming Parallax Correction
After setting your parallax adjustment, verify the correction by moving your eye slightly behind the scope. Watch the reticle to see if it shifts relative to the target. A properly adjusted parallax means the reticle stays perfectly centered and stable on the target no matter your eye position.
If you notice the reticle floating or moving, make minor adjustments with the parallax control and repeat the eye movement test. Accurate alignment reduces shooting errors caused by off-center eye placement, especially important at longer ranges or higher magnifications.
- Keep the rifle steady on the rest and focus on the target through the scope.
- Slightly shift your head left, right, up, and down while keeping your eye behind the scope.
- Observe if the reticle moves relative to the target. Any shift means parallax is not fully corrected.
- Adjust the parallax knob or AO ring accordingly to minimize reticle movement.
- Repeat the eye movement test until the reticle remains motionless across all positions.
What Parallax Means and Why It Matters for Accuracy

Parallax in a rifle scope occurs when the reticle and the target image are not on the same focal plane. This means that when you move your eye slightly behind the scope, the reticle appears to shift against the target. This shifting results in aiming errors because the crosshairs no longer point exactly where the bullet will impact. These errors become more noticeable at longer ranges, beyond 200 yards or with high magnification scopes, where even a small misalignment can cause a miss measured in inches.
Most riflescopes without an adjustable parallax are factory-set to be parallax-free at a specific distance, typically 50 yards for rimfire rifles and around 100 to 150 yards for centerfire rifles. Shooting at distances other than these means you will likely experience some parallax error. For example, aiming at 400 yards with a scope fixed at 100 yards could result in a 1 to 2 inch error on target, according to data from the National Rifle Association. This margin can increase with off-center eye positioning, which causes the reticle to visibly move and exaggerate the error.
Adjusting parallax involves aligning the reticle so it stays fixed on the target image, even if your eye position shifts slightly. This is done by using the parallax adjustment knob, which changes the scope’s focus plane. Turning this knob brings the reticle and target into the same focal plane, effectively eliminating parallax error at the chosen distance. The process requires small, deliberate adjustments while observing if the reticle moves against the target when your head shifts.
Your eye position affects parallax significantly. Consistent cheek weld and eye relief reduce the risk of parallax error, as moving your head changes the relative position of the reticle on the target if parallax is present. Proper scope mounting at the right distance from your eye is essential to see the full scope field clearly and make accurate parallax adjustments. In long-range and tactical shooting scenarios where your shooting position might vary, adjustable parallax compensates for slight head movements, maintaining accuracy.
Costs of scopes with adjustable parallax typically start higher than fixed parallax models, but for precision shooting beyond 200 yards or in competitive environments, this feature is critical. Good results mean the target image and reticle appear locked together no matter how much you shift your eye side to side or up and down. Without adjusting parallax correctly, even a scope perfectly zeroed at a certain distance can cause significant misses, negating your efforts to improve accuracy.
Always confirm your parallax adjustment at your intended shooting distance, especially before long-range shots, to avoid parallax-induced aiming errors.
Types of Parallax Adjustments: Side Focus vs Adjustable Objective
Rifle scopes with adjustable parallax typically use either a side focus knob or an adjustable objective lens to correct parallax error, while some scopes have fixed parallax that cannot be adjusted. Side focus adjustments put the correction knob near the turrets for quick access, favored in tactical and long-range scopes. Adjustable objective lenses require rotating the front lens ring, often on hunting scopes where the shooter extends their arm forward to make adjustments. Knowing which type your scope has helps you adjust parallax accurately and maintain your shooting position.
Side Focus Adjustment Explained
The side focus adjustment places a parallax correction knob on the left side of the scope near the turret housing. This knob usually resembles a turret and includes distance markings that correspond roughly to target distances. You turn it until the reticle and target appear sharply focused on the same plane, eliminating parallax error. This design allows you to adjust parallax without shifting your eye or position, which helps maintain consistent shooting posture and faster adjustments under time pressure.
Since side focus adjustments move internal lenses very precisely, they offer a narrow depth of focus optimal for ranges typically beyond 100 yards, especially on scopes over 10x magnification. The side knob’s location provides durability and accessibility, traits sought by precision shooters. However, parallax markings on the knob are approximate due to variations caused by the eyepiece diopter and magnification settings.
Adjustable Objective Lens Overview
The adjustable objective (AO) lens uses a rotating ring on the front of the scope’s objective bell to change focus and correct parallax. You adjust the AO by reaching out and turning the ring while keeping your shooting position steady. This method physically moves the front lens elements, shifting the focal plane to align the reticle with the target image precisely.
AO systems are common on hunting scopes and riflescopes designed for shooting at a range of distances, notably with rimfire rifles or at distances up to 150 yards for parallax-free settings. The adjustment range roughly corresponds to distances marked on the objective bell, though like side focus controls, these increments should be fine-tuned visually. Adjusting the AO requires some arm extension, which can slow transitions compared to side focus knobs in tactical shooting.
Fixed Parallax Scopes Overview
Fixed parallax scopes have no mechanism to adjust parallax. These scopes are pre-set to minimize parallax error at a specific distance, often around 100 yards. This setup simplifies the scope design and reduces weight and cost, making it popular for rimfire and entry-level hunting scopes. However, fixed parallax scopes can introduce parallax error at distances significantly different from their set focus point, potentially affecting accuracy at close or extended ranges.
Fixed parallax is limited by the scope’s design; for example, a 40mm objective lens typically limits parallax error to less than 1.5 inches at around 300 yards, a margin often smaller than shot group sizes. These scopes are best if you mostly shoot at a consistent, moderate range where parallax adjustments are less critical.
| Feature | Side Focus Adjustment | Adjustable Objective (AO) | Fixed Parallax |
|---|---|---|---|
| Adjustment Location | Left side turret near elevation/windage | Rotating ring on front objective bell | No adjustment ring or knob |
| Ease of Use | Fast, maintains shooting position | Requires extending arm, moderate speed | No user adjustment needed |
| Best Use Case | Long-range shooting, high magnification scopes | Hunting, varied distances up to 150-300 yards | Consistent midrange shooting, cost-conscious applications |
| Typical Magnification | Usually 10x and above | Often found on lower to mid-range magnifications | Varies widely; often lower magnifications |
| Distance Markings | Approximate yardage on knob | Approximate yardage on objective bell | None |
| Adjustment Precision | High, fine lens movements | Moderate, changes lens position | Fixed at one distance |
| Common Rifle Types | Precision tactical, long-range centerfire | Rimfire and lever-action hunting rifles | Basic hunting rifles, budget models |
Choosing between side focus and adjustable objective depends on your shooting style and typical range distances. Side focus suits shooters valuing quick adjustments without losing position. Adjustable objective fits hunters who don’t mind reaching forward and shoot over various distances. Fixed parallax scopes offer simplicity and reliability where parallax error is minimal or acceptable within typical shot groupings.
Ideal Distances and Magnifications for Parallax Adjustment
Adjusting parallax is necessary when your target distance changes significantly, especially beyond 75 yards. For example, if your last parallax setting was for a 100-yard target and your new target is at 200 yards, you should retune your scope’s parallax to match the new distance. This ensures that the reticle and target image are aligned on the same focal plane, which reduces aiming errors caused by parallax shift.
Magnification plays a key role in how critical parallax adjustment becomes. At higher magnifications, such as 10x or above, even slight parallax errors can shift the point of impact enough to affect accuracy. Competitive shooters using TORIC scopes or hunters with TEKOA scopes will notice immediate accuracy improvements by dialing parallax to the exact range. At lower magnifications, say 3x to 5x, minor parallax presence typically causes less noticeable drift, so some shooters may choose to skip adjustment for targets under 300 yards.
Begin adjusting parallax by measuring the target distance with a laser rangefinder or familiar reference points. Next, use the parallax adjustment knob found on the scope’s side or front to set the corresponding yardage. Once adjusted, keep your rifle steady and shift your head slightly in different directions behind the scope. A reticle that stays aligned with the target throughout confirms parallax has been compensated for that distance.
Skipping parallax adjustment can be acceptable when shooting at targets closer than about 300 yards because parallax errors remain too small to cause meaningful point-of-impact shifts. However, when targeting objects smaller than 2 to 3 inches at distances greater than 500 yards, failure to adjust parallax often leads to noticeable missed shots. This happens because the depth of focus of most rifle scopes is narrow, and any misalignment of the reticle and target image causes the shooter’s eye movement to translate into aiming errors.
Setting parallax correctly takes only a few seconds once you get used to it but makes a measurable difference, especially at longer ranges or when using high magnification. The adjustment does not require additional equipment beyond your scope and a basic method for estimating target distance. By routinely matching parallax to distance, you ensure your scope’s reticle remains locked on target regardless of small head or cheek position changes, keeping your shots as accurate as possible.
How Scope Mounting and Eye Relief Affect Parallax
Mounting the scope correctly is key to reducing parallax errors. Secure the scope rings evenly on the rifle’s base and ensure the scope tube is straight and centered. Proper alignment prevents the scope from shifting under recoil, which otherwise causes the reticle to appear off when your eye moves. Use a torque wrench to tighten screws to the manufacturer’s recommended settings, usually between 15 and 20 inch-pounds, to avoid damaging the scope or mounting hardware.
Positioning the scope for correct eye relief comes next. Eye relief is the distance between your eye and the eyepiece where the full view without shading or black rings appears. For most low-power variable optics (LPVOs), this is typically 3 to 4 inches. Consistent eye relief prevents you from moving your head during shooting, which is important because even slight shifts cause parallax errors. Set up your rifle in your shooting position and slide the scope back and forth until you get a clear, full sight picture without distortion, then lock the rings down carefully.
Scope leveling ensures the reticle is square to the rifle. An unlevel scope changes the point of impact during canting, which can worsen parallax effects. Use a bubble level on the rifle’s action and another on the scope’s turret cap during mounting. This avoids oblique angles that make the reticle drift relative to the target when you shift your eye position.
- Use a stable rifle rest or sandbags in your shooting position to mount and adjust the scope.
- Mark your preferred eye relief spot with tape on the scope tube as a quick reference during mounting.
- Check for any tube twist by looking through the scope at a flat, vertical post during mounting.
- Adjust parallax only after securing the scope and confirming eye relief and level.
- Recheck eye relief and level after shooting some rounds, as recoil can shift rings.
Always double-check your eye relief and scope level each time you remount your optic to avoid introducing parallax errors.
Achieving proper mounting and consistent eye relief requires patience but crucially improves accuracy. Costs vary from about $20 for a torque wrench and $15 for bubble levels to consider professional tools. Setup usually takes 20 to 30 minutes per rifle. Poor mounting leads to repeated target shifts as your head moves, especially beyond 300 yards, where parallax errors become more pronounced, sometimes moving the impact point by over an inch laterally. Correctly setting eye relief and leveling minimizes these problems for reliable, repeatable shots.
Common Parallax Mistakes and How to Fix Them
Shooters frequently make avoidable mistakes when setting parallax on their rifle scopes, which can negatively impact accuracy at various distances. One common error stems from inconsistent eye position. Even slight variations in how you place your eye behind the scope, known as your cheek weld, can create parallax errors. The National Shooting Sports Foundation emphasizes that aligning your eye with the center of the scope eliminates most parallax issues, highlighting the importance of a consistent head position on the stock.
Another mistake comes from misunderstanding the limits of fixed parallax scopes. A scope with a fixed parallax setting, often optimized around 100 yards, cannot compensate for changes at shorter or much longer ranges. This limitation means you’ll always have some degree of parallax error if you aren’t adjusting for distance properly. Side-focus parallax adjustments provide more precise control and are preferred by modern shooters for eliminating error at various distances.
Parallax adjustment is not a magic fix for a poorly mounted scope. Problems like loose mounts, incorrect canting, or inadequate eye relief need to be addressed before relying on parallax knobs. Trying to correct for these mounting issues with parallax can actually worsen your grouping by introducing inconsistent aim points.
- Maintain a consistent cheek weld to keep your eye centered on the scope.
- Use side-focus adjustments for shooting at non-standard distances.
- Check scope mounting tightness and alignment before adjusting parallax.
- Avoid relying solely on fixed-parallax scopes for distance variability.
- Confirm eye relief distance is consistent to prevent shifting point of view.
- Test your setup with targets at multiple distances to verify parallax settings.
- Reset parallax when changing shooting position or magnification.
In practical terms, focus on consistent positioning to reduce parallax error significantly. Set your cheek weld so your eye aligns with the scope’s optical center each time you shoulder the rifle. Then, use the parallax adjustment knob to fine-tune focus and alignment for the target distance. This two-part approach works better than compensating with parallax adjustment alone.
Testing your rifle and scope in realistic shooting scenarios reveals how small tweaks improve accuracy. At 50 yards, typical parallax error may be less than a fraction of an inch, often smaller than your normal group size. However, at longer distances, improper parallax adjustment or inconsistent eye placement can cause misses. Checking and adjusting for parallax regularly helps ensure tighter groupings and reliable shot placement.
Best Sequence to Zero Your Scope and Set Parallax
Start by zeroing your rifle scope at a known fixed distance before adjusting the parallax. Getting the zero right first ensures your shots hit where expected. After this, focus on adjusting the reticle’s sharpness and proper eye relief. Finally, set the parallax exactly to match your target distance, confirming minimal reticle movement during small head shifts.
Establishing a Baseline Zero at a Fixed Distance
Begin by selecting a reliable zeroing distance, typically 100 yards for most centerfire rifles. This distance balances long-range accuracy with practical field use. Setting your base zero here ensures the scope’s reticle and bullet impact points align properly, minimizing guesswork during parallax adjustment.
Before touching parallax controls, make sure the rifle is stable, and the target is clearly visible. The bullet groups should cluster consistently around your aiming point.
- Set up a target securely at 100 yards.
- Stabilize your rifle using a bench rest or bipod for minimal movement.
- Adjust windage and elevation turret dials to bring your point of impact onto the bullseye.
- Fire several groupings to verify hit placement and consistency.
- Repeat adjustments until your bullet groups consistently center on target.
Fine-Tuning Reticle Focus and Eye Relief
Once zeroed, focus your scope’s reticle for maximum sharpness. This prevents any blur between reticle and target, which can hamper aiming precision. Proper eye relief also plays a critical role in this clarity, ensuring full sight picture without distortion.
Set the diopter adjustment to fine-tune the reticle clarity. Start by placing the diopter at zero or the midpoint of its adjustment range and then adjust until the reticle looks crisp against a blank sky or uniform background. Adjust your head position to find the ideal eye relief distance where you see a full and bright image.
- Point the rifle at a neutral background like a clear sky or plain wall.
- Rotate the diopter ring slowly until the reticle appears sharply focused.
- Move your head slightly back and forth to find the eye relief that provides a full sight picture.
- Lock your head position and note the feel for future consistency.
Adjusting Parallax for Target Distance and Confirming Precision
With zero and reticle clarity set, adjust the parallax control to match the actual distance to your target. This aligns the reticle and target image on the same focal plane, eliminating reticle shift caused by slight head movements. Setting parallax correctly is especially important for precision shots beyond 100 yards.
Start by positioning the parallax knob near the target’s estimated range. Fine-tune it by gently moving your head left, right, up, and down behind the scope. Observe how the reticle moves relative to the target as you make these movements. The parallax is set correctly when the reticle remains fixed on the target regardless of small changes in your head position.
- Estimate the target distance and set the parallax knob close to that range or to infinity if the distance is unknown.
- Look through the scope while moving your head side to side and up and down slightly.
- Adjust the parallax ring slowly until the reticle no longer seems to move off the target during head movement.
- Confirm by taking a few follow-up shots or observation passes to check for any aiming shift.
When to Seek Professional Help with Parallax Setup
Call a professional gunsmith or optics technician for parallax adjustments if you notice consistent aiming errors beyond what you can correct through the scope’s parallax controls. This applies especially at distances over 150 yards and magnifications above 10x, where parallax problems become more pronounced. Professionals can diagnose if the scope’s internal components are misaligned or if your current mounting setup contributes to persistent parallax error.
Professional mounting and fine-tuning often reduce parallax error more effectively than owner adjustments alone. A gunsmith uses specialized tools to ensure the scope is perfectly centered and aligned with the rifle’s bore axis. This process minimizes parallax by preventing optical misalignment, a common cause of aiming shifts when you move your head slightly. In many cases, professional mounting can improve precision by aligning the scope’s optical axis within fractions of a millimeter relative to the bore.
Spotting when to seek professional help involves a decision rule based on your ability to eliminate parallax error by adjusting the scope yourself. First, verify the parallax focus knob or side adjustment focuses clearly at your target distance. When you notice the reticle moving against the target as you shift your eye position, or consistent group shifts happen at longer ranges despite your efforts, it’s time to call an expert. Another red flag is if your scope shows blurry images or inconsistent focus despite adjustment; internal lens issues may be the cause.
Consider also the rifle and scope combination you use. High-magnification scopes with adjustable objectives tend to be more sensitive to parallax errors, requiring precise setup. Hunting rifles used mainly under 100 yards often experience negligible parallax effects, typically under 0.5 inches, so professional intervention is rarely needed in those scenarios. For longer-range target shooting or hunting beyond 150 yards, professional setup can be a worthwhile investment. Costs vary by region but expect to pay between $50 and $150 for expert mounting and parallax calibration.
For a DIY approach before consulting an expert, try tightening or reattaching the scope mount using a torque wrench set to the specifications provided by your scope and rifle manuals. Loosen or uneven mounting screws often cause optical misalignment that looks like parallax. After re-mounting, adjust the parallax knob at your expected shooting distance. Seeing the reticle stay stable while you move your eye usually means the mounting is solid.
Regularly check scope mounting tightness to avoid parallax errors caused by loose or misaligned components, especially after heavy shooting sessions or transport.
Step-by-Step Action Plan for Setting Parallax on Your Rifle Scope
Follow these steps carefully to set your parallax correctly and improve your shooting precision at any range.
- Before you start: Mount your rifle scope securely and ensure proper eye relief; you should have a clear, full sight picture without any shadow or distortion.
- Day 1: Zero your rifle at a known fixed distance (usually 100 yards for many rifles); this confirms your scope’s base accuracy before adjusting parallax.
- Day 2: At the zero distance, adjust the parallax knob or side focus until the reticle and target are perfectly aligned without movement when you shift your head slightly.
- Week 1: Test at multiple distances you plan to shoot; adjust the parallax for each distance so your reticle remains sharp and stable relative to the target.
- After 2 weeks of practice: Confirm your parallax settings by doing dry-fire or live-fire drills; consistent shot placement without reticle shift means the parallax is set right.
- When shooting new distances outdoors: Adjust side focus or adjustable objective to the estimated range, then fine-tune by checking for reticle movement with slight head shifts.
- Ongoing: Periodically recheck parallax adjustments, especially after scope or mount changes, to maintain accuracy.
Frequently Asked Questions
How Do I Know If Parallax Is Affecting My Shooting Accuracy?
Parallax error causes the reticle to shift on the target as your eye moves, causing missed shots. You can test this by moving your head slightly behind the scope while watching the reticle; if it moves independently from the target, parallax is an issue.
Can I Leave Parallax Fixed on a Single Distance for Hunting?
You can set parallax to a mid-range distance common in your hunting environment, but it’s best to adjust for varying distances to maintain accuracy. Fixed parallax might cause errors at close or long ranges depending on where it’s set.
Is Parallax Correction Important at Low Magnification?
Parallax error usually decreases at lower magnification and closer distances, so correction is less critical but still beneficial for precision shooting. Adjust as needed for your shooting conditions.
How Often Should I Adjust Parallax During a Shooting Session?
Adjust parallax whenever your target distance changes significantly, or if you notice reticle shift. Frequent small adjustments ensure the reticle and target stay on the same focal plane.
Does Using Different Ammo Affect Parallax Settings?
Different ammo typically won’t affect parallax directly but can impact point of impact, so parallax adjustments remain based on target distance and magnification, not ammo type.
Can Parallax Adjustment Fix Eye Strain When Using a Scope?
Proper parallax adjustment helps keep the image sharp and eliminates reticle movement, which can reduce eye strain during extended use. Aligning the reticle and target plane is key.
Final Thoughts
Setting parallax properly sharpens your sight picture and reduces aiming errors, important for precision at varying distances. Start with your zeroed rifle and practice adjusting parallax at your typical shooting ranges to see the difference. Next time at the range, pay close attention to any reticle movement as you shift your eye and adjust accordingly, this simple step will boost your accuracy significantly.