Do It Yourself Security Camera Installation: Step-by-Step Guide for Homeowners
Installing your own security cameras is entirely achievable, even with minimal technical experience. Modern do it yourself security camera installation kits are more user-friendly than ever, enabling homeowners to mount cameras, connect wiring, and set up monitoring apps in a single afternoon. With clear instructions and online support, you can protect your property and loved ones without the cost of professional installation.
This matters because effective surveillance deters burglars, provides valuable evidence in the event of incidents, and offers peace of mind—often at a fraction of the price of a monitored system. Plus, when you handle the installation yourself, you retain full control over camera placement, data privacy, and ongoing maintenance.
In this comprehensive guide, you’ll find a detailed overview of equipment choices, pre-installation planning, mounting techniques, networking essentials, and practical troubleshooting advice. We’ll break down the strengths and drawbacks of different DIY solutions, guide you through configuring your system for reliable performance, and help you avoid common pitfalls.
Essential Equipment for Do It Yourself Security Camera Installation
Types of Security Cameras for Home Use
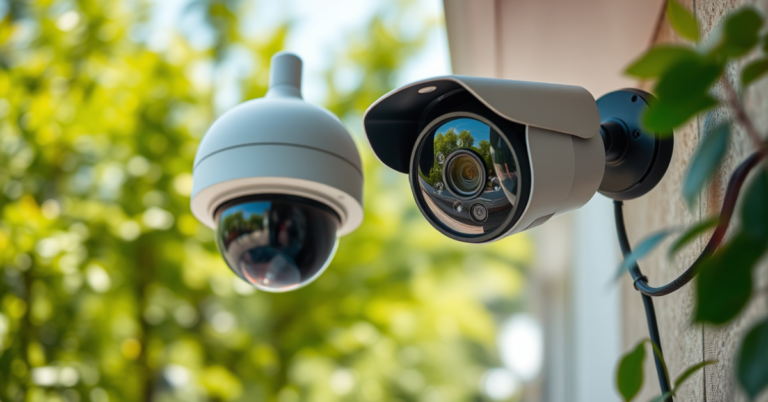
There are several main categories of security cameras suited for DIY home surveillance setups. Indoor cameras are usually compact and plug directly into wall outlets, while outdoor models are weatherproofed and may require more robust mounting. Dome, bullet, and wireless cameras each provide unique features and aesthetics that affect coverage and installation complexity.
Popular wireless models like the Arlo Pro series are ideal for renters thanks to adhesive mounts, while wired PoE (Power over Ethernet) cameras deliver uninterrupted power and higher video quality. Choosing between analog and digital systems impacts both cost and usability, so consider your existing Wi-Fi strength and technical skill level.
- Indoor, outdoor, and doorbell cameras
- Dome, bullet, and turret designs
- Analog vs. digital (IP) cameras
- Wireless vs. wired (PoE) options
Must-Have Installation Tools and Accessories
Successful do it yourself security camera installation hinges on having the right toolbox ready. Essential tools include a cordless drill, ladder, screwdriver set, cable clips or raceways, weatherproof electrical tape, and a smartphone or laptop for system setup. Some kits include mounting hardware, but sturdy anchors and adapters may be necessary for masonry or siding.
Extra-long Ethernet cables, extension cords, and spare batteries for wireless units ensure you can tailor the setup to unusual layouts or outdoor installations. High-quality drill bits and stud finders make mounting easier and safer, especially for exterior walls.
- Cordless drill and bits
- Screwdrivers and anchoring tools
- Cable clips, raceways, or conduit
- Ladder, smartphone or laptop
Planning Your Camera Layout for Maximum Coverage
Mapping Vulnerable Zones Around Your Property
Before drilling any holes, walk through your property and identify entrances, walkways, windows, and blind spots. Ideally, cameras should cover all ground-floor doors, driveways, and first-floor windows. Overlapping camera fields of view help avoid gaps that intruders might exploit in your DIY home surveillance setup.
Angles matter: Aim for broad coverage rather than tight shots on a single point. For detached garages or sheds, consider long-range outdoor cameras or solar-powered units for areas without convenient power.
- Entry doors and garage doors
- Windows not visible from the street
- Exterior pathways and gates
- Driveways and parking areas
Determining Camera Height, Range, and Field of Vision
The ideal installation height for most cameras is 8 to 10 feet above ground to avoid tampering and capture clear facial detail. Angle cameras downward to minimize glare and sun interference, and test camera fields of view using your mobile app before fixing anything permanently.
Choose lenses with appropriate viewing angles: 90°–120° for entrances, up to 160° for wide driveways or patios. Pay attention to manufacturer specifications for night vision and motion detection distances; placement too far from your zone of interest can reduce effectiveness.
Physical Mounting and Weatherproofing Techniques
Best Practices for Mounting Cameras Indoors and Outdoors
Always dry-fit mounting brackets before drilling. For outdoor cameras, install under eaves or awnings whenever possible, shielding them from rain and direct sunlight. Use weather-resistant hardware and secure cables against wind or pests.
Indoors, mount cameras high in room corners for expansive angles. Avoid pointing at glass doors or interior lights to minimize glare. Tight cable management not only looks cleaner but prolongs the camera’s lifespan.
- Pre-drill holes for brick or stucco walls
- Seal entry points with silicone caulk
- Route wires discreetly along trim or baseboards
Protecting Cables and Electronics from Harsh Conditions
Cable durability is crucial for outdoor installations—use UV-resistant, waterproof Ethernet cables and weatherproof junction boxes where feasible. Protect power adapters and PoE injectors in covered outlets or waterproof boxes.
For extra insurance, double-wrap all cable connections with weatherproof electrical tape and avoid extreme tension or sharp bends. Replace worn or chewed cables promptly to maintain video reliability.
Configuring Networks and Recording Options for DIY Home Surveillance Setup
Wi-Fi, Wired, and Hybrid Network Integration
A stable network is vital for streaming live video and instant alerts. Most users start with Wi-Fi-connected cameras but consider wired Ethernet for distance or heavy video traffic. Mesh Wi-Fi systems extend coverage for larger houses and detached structures, boosting reliability for DIY home surveillance setup.
For hybrid installations, powerline adapters transmit Ethernet signals over electrical wiring, simplifying connections in older homes. Prioritize secure Wi-Fi encryption and strong passwords to guard against hacking attempts.
- Dual-band Wi-Fi routers for 2.4/5 GHz
- PoE switches for multiple wired cameras
- Mesh extenders for signal dead zones
Storage Solutions: Cloud, Local, or Hybrid
Most modern systems offer cloud recording but may charge monthly fees. Local storage options include microSD cards, NVRs (network video recorders), or external hard drives. Each approach has trade-offs in cost, convenience, and data privacy.
Hybrid storage—saving key clips to the cloud and full footage locally—offers the best of both worlds. Ensure you regularly back up recordings and test retrieval features before relying on your setup in case of emergencies.
- MicroSD cards for basic storage
- NVRs for multi-camera systems
- Cloud subscriptions for remote access
Fine-Tuning Alerts, Motion Detection, and App Integration
Setting Up Mobile Alerts and Notifications
Download the camera's companion app and connect each device using QR code scanning or manual entry. Tailor alert notifications for people, vehicles, or packages—critical for reducing false alarms that can quickly become frustrating.
Enable push notifications, but customize quiet hours or schedules to avoid disruptions during regular activity. For shared households, enable multi-user access while restricting admin controls as needed.
- Enable two-factor authentication
- Adjust motion sensitivity in the app
- Integrate with smart home hubs (Alexa, Google Home)
Optimizing Motion Detection Zones and Sensitivity
Most DIY home surveillance setup software allows you to draw custom motion detection zones on your camera feed. Focus only on walkways or entry points to ignore swaying trees or passing cars. Incrementally increase sensitivity until you find the right balance—overly sensitive systems trigger unnecessary recordings, draining battery life.
For indoor cameras, use pet-immune detection modes to avoid endless alerts from cats or dogs. Periodically review the system’s event log to spot recurring false positives and fine-tune settings as needed.
Troubleshooting and Maintaining Your DIY System
Common DIY Installation Pitfalls and Fixes
Frequent signal dropouts, blurry night vision, or stray reflections are common in do it yourself security camera installation. Double-check Wi-Fi signal strength at installation points with your phone before mounting. Replace or upgrade power adapters if cameras reboot randomly or show dim IR LEDs.
For PoE setups, ensure your switch meets the total power draw for all cameras. Always follow system prompts for firmware updates—they often address critical vulnerabilities or add new features.
- Check for firmware updates regularly
- Test all camera views before finalizing mounts
For further background on the evolution and technology behind modern home surveillance, readers may appreciate Wikipedia’s overview of closed-circuit television (CCTV). Wikipedia’s overview of closed-circuit television (CCTV).
Routine Upkeep for Streaming and Storage Reliability
Monthly checks help keep your DIY system running smoothly. Wipe camera lenses to prevent dust or spiderweb buildup, and review video clips to verify time stamps and audio quality. Schedule routine reboots for cloud-connected devices to avoid memory leaks or system slowdowns.
For local storage, periodically offload or archive older footage to external drives. A clean, well-maintained installation minimizes future troubleshooting and keeps your investment secure.
DIY Security Camera System Category Comparison
Below is a side-by-side comparison of popular categories of DIY home surveillance systems, highlighting their connectivity, ideal use case, installation difficulty, and ongoing costs.
| Category | Connectivity | Best For | Storage Type | Typical Cost | Installation Difficulty |
|---|---|---|---|---|---|
| Wireless Battery Cameras | Wi-Fi | Apartments/Renters | Cloud or microSD | $100–$300 per camera | Easy |
| PoE Wired Systems | Ethernet | Larger Homes/Outdoors | NVR/Local | $350–$1000+ per kit | Moderate |
| Hybrid (Wi-Fi + Wired) | Mixed | Expansive Properties | Cloud + NVR | $180–$600 per camera | Challenging |
| Doorbell Cameras | Wi-Fi | Entrances | Cloud/MicroSD | $80–$250 | Easy |
| Analog DVR Kits | Coaxial Cable | Budget Installs | DVR/Local | $120–$350 per kit | Moderate |
Frequently Asked Questions
What tools do I need for do it yourself security camera installation?
You’ll need a cordless drill, screwdrivers, ladder, cable clips, weatherproof electrical tape, and a smartphone for setup. Having extra mounting anchors and cable management supplies is helpful, especially for outdoor or multi-story installations.
Can I install security cameras without Wi-Fi?
Yes, many wired systems use PoE (Power over Ethernet) or analog coaxial cables and do not require Wi-Fi. These setups often offer enhanced reliability and are ideal if your internet is spotty or if you want to avoid potential wireless interference.
How do I prevent false alarms in my DIY setup?
Customize motion detection zones and adjust sensitivity in your camera’s app. Focus alerts on critical access points, avoid coverage of busy streets or trees, and utilize pet-immune settings to minimize unnecessary notifications from non-threatening movement.
Are DIY security camera systems secure against hackers?
Security depends on strong passwords, encrypted connections, and frequent firmware updates. Always opt for reputable brands, enable two-factor authentication, and stay vigilant for updates to protect your home surveillance from unauthorized access or breaches.
Is cloud storage necessary for DIY home surveillance?
Cloud storage is optional but adds remote access and redundancy. Local storage with NVRs or microSD cards works well for most setups but can be vulnerable to theft or damage. Many users choose hybrid setups for optimal backup and convenience.
Key Takeaways
- DIY security camera systems are more accessible and effective than ever.
- Choosing between wireless and wired depends on home layout and tech comfort.
- Proper planning and mounting ensure maximum coverage and performance.
- Routine maintenance keeps your DIY surveillance setup reliable for years.
Conclusion
Successfully tackling do it yourself security camera installation requires thorough preparation, clear priorities, and a willingness to troubleshoot. By carefully selecting your equipment, mapping vulnerable zones, and understanding the trade-offs between wired and wireless systems, you gain the flexibility to design a surveillance network tailored to your property and privacy needs. Leveraging the latest app features, storage solutions, and best installation practices enables you to enjoy reliable, real-time protection at a fraction of the cost of professional services.
For those seeking a simple, fast deployable system, wireless battery-powered cameras, such as the Arlo or Ring products, offer easy configuration and minimal drilling—ideal for renters or those new to DIY projects. In contrast, those ready for more robust, long-term setups should consider PoE wired systems, which deliver stable video feeds and integrate seamlessly with NVRs for superior storage. If property coverage needs span large areas or include outbuildings, hybrid solutions combining both wired and wireless technology maximize security while balancing installation effort.
Regardless of which system you choose, take time to familiarize yourself with app settings, network security, and local recording processes. Continually reviewing camera positions, app notifications, and hardware condition ensures the system remains responsive to evolving threats. Document your install steps, keep credentials secure, and consider enrolling family members for improved vigilance. With these steps, you'll achieve dependable DIY surveillance and the peace of mind that comes with a well-protected home.