How to Level a Rifle Scope: Simple Steps and Expert Tips for Accuracy
Leveling a rifle scope means adjusting it so the reticle is perfectly vertical and horizontal relative to the rifle. This ensures your point of aim matches your point of impact, improving shooting accuracy. Learning how to level a rifle scope helps you avoid cant-induced misses and maximizes precision, especially at longer distances.
This guide is for hunters, precision shooters, and firearm enthusiasts who want consistent accuracy. You’ll find clear steps, tool recommendations, and tips to level your scope correctly and maintain it over time.
Key Takeaways
- Mount your rifle scope securely before attempting to level it to prevent shifting during shooting.
- Use a bubble level or an angle cube on the rifle to speed up leveling for platforms like AR-15s.
- Hang a plumb bob or weighted string 20, 30 feet in front of your rifle for an accurate vertical reference.
- Focus your scope’s reticle on the plumb bob string to align the crosshairs vertically.
- Take your time; properly leveling a scope usually takes about 10-15 minutes to complete.
- Small cant angles as little as 2 degrees can cause significant misses at long range, so accuracy matters.
What Does Leveling a Rifle Scope Mean?
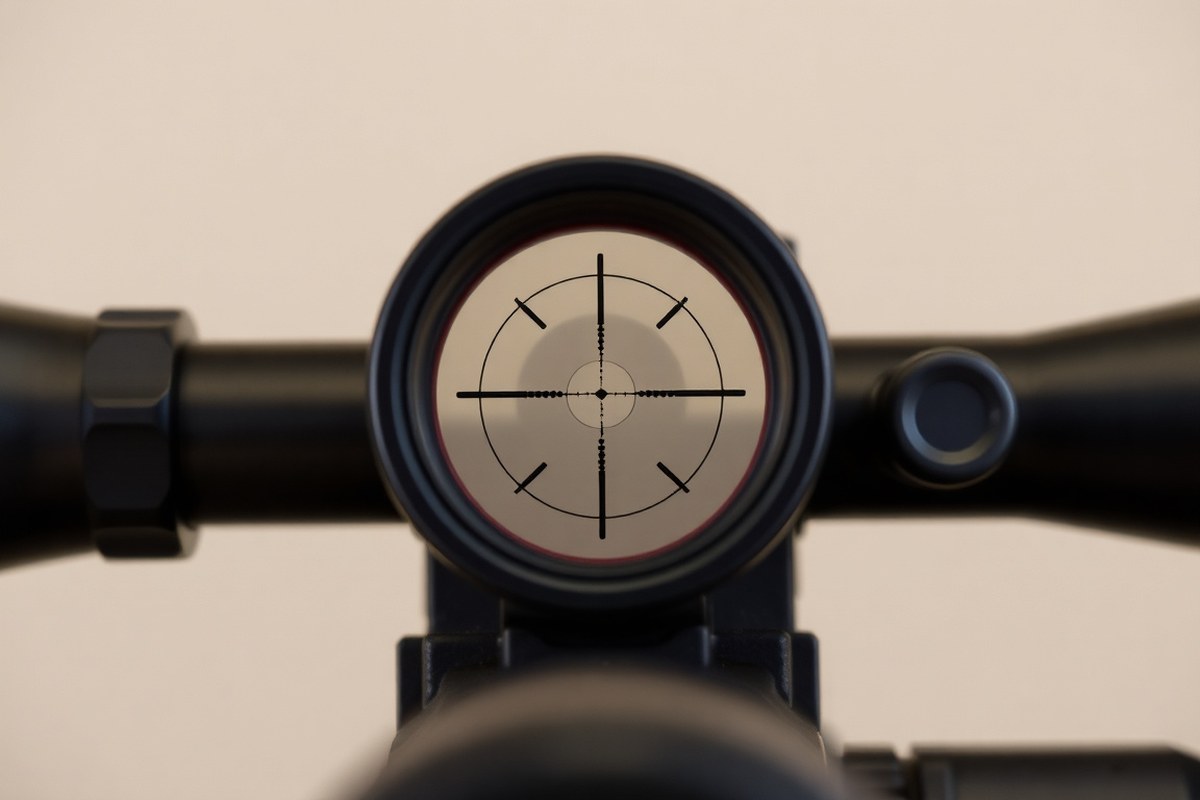
Leveling a rifle scope means aligning the reticle so it is perfectly in line with your rifle’s bore axis, not just making the scope level in relation to the ground. The bore axis is the line along which your bullet travels as it leaves the barrel. When the scope is properly leveled to this axis, your point of aim matches where your shot hits, which is critical for accuracy.
This differs from simply leveling the scope relative to the ground, which is what a carpenter’s level does by measuring against gravity. If you only level the scope flat to the horizon without considering the rifle’s orientation, the reticle can end up canted. This means the crosshairs will tilt in relation to the bore, causing your shot placement to shift left or right as the distance to the target increases, even with precise sighting in.
To level your scope correctly, first secure your rifle in a vise or shooting rest. Use a bubble level to make sure the rifle’s action or rail is perfectly horizontal. Next, place your scope in the rings and adjust its rotation until the reticle matches the rifle’s level. This process usually takes 10 to 15 minutes and may involve using additional tools like a bore sighter or laser collimator to confirm alignment. Aligning the scope to the bore axis prevents errors caused by canting and ensures consistent shot placement at all distances.
When the scope is canted, even slightly, it can cause your shots to drift laterally because the reticle’s horizontal and vertical lines no longer match the bullet’s trajectory properly. This effect worsens at longer ranges, where minor angles cause more dramatic shifts in point of impact. That means missing your target even if your rifle and scope setup are otherwise well-tuned.
Temperature changes can also subtly affect scope leveling. Materials in the rifle and scope expand or contract with temperature fluctuations, which can slightly alter alignment over time. For this reason, it’s a good idea to check scope level periodically, especially before precision shooting sessions or competitions.
Different shooting scenarios may require slightly different considerations when leveling a scope. For instance, long-range target shooters may need extreme precision with scope leveling to maintain accuracy over hundreds of yards. Hunters or casual plinkers might prioritize faster adjustments but still benefit from a properly leveled scope to avoid cant-induced misses. Regardless of your use, leveling your scope to the rifle’s bore axis is the essential starting point for accurate shooting.
Why Is a Level Scope important for Shooting Accuracy?

Leveling your rifle scope ensures that the vertical crosshair truly aligns with the rifle’s up-down axis. This alignment is critical because canting your rifle, tilting it slightly left or right, causes the bullet to miss horizontally from where you aim, even if your vertical adjustments seem correct. At 100 yards, canting usually has a minimal horizontal impact, but as distances increase, the error grows significantly. For example, at 1000 yards, just a one-degree cant can shift your shot by about 5 inches, enough to miss a six-foot square target entirely.
The reason this happens is that when your scope isn’t level, vertical elevation adjustments don’t just move your point of impact up or down. They also push it slightly left or right, which distorts your bullet drop compensation and wind correction. This complicates shot placement, especially in precision shooting scenarios where accuracy at extended ranges is essential. For precision shooters who engage targets beyond 300 yards, even minor cant errors can ruin a group or a critical shot. Conversely, hunters shooting inside 200 yards usually find a leveled scope less important because the margin for error is wider and typical hunting shots aren’t as sensitive to small horizontal shifts.
Achieving proper scope leveling involves careful bore alignment and the use of leveling tools to establish a consistent reference point. Ensuring your rifle is steady and bore-sighted correctly prevents canting from the start. Using a bubble level attached to the rifle and another on the scope’s turret helps you confirm that both are perfectly aligned. You want to make sure that the scope’s reticle does not move horizontally when you adjust elevation, it should only move up or down according to your bullet drop. This process often involves small incremental adjustments and verifying through test shots at known distances.
For those adjusting scopes with standard click values, remember that each elevation click typically moves your point of impact by about a quarter-inch at 100 yards. A slight cant shifts these adjustments off their intended axis, causing horizontal deviation. Learning to recognize cant errors and correcting them is important for maintaining tight groupings and reliable shot placement during long-range shooting. For hunting at close distances, spending less time on perfect leveling might be acceptable, but when precision is the goal, investing time in leveling pays off.
Always verify that your scope’s reticle stays on a true vertical line after elevation adjustments; if it shifts horizontally, recant and relevel your setup before shooting.
Essential Tools for Leveling Your Rifle Scope
To level a rifle scope accurately, you need to use tools that help align both the rifle and scope perfectly horizontally and vertically. The key instruments include bubble levels, plumb bobs, and digital levels or angle cubes. Each has pros and cons related to speed, precision, and cost, while some DIY options can also work well for shooters on a budget.
Bubble Levels for Fast Alignment
Bubble levels provide a quick, visual way to get your rifle and scope aligned. You can attach small bubble levels designed specifically for rifle scopes onto the flat parts of the rifle action or directly on top of the elevation turret. This method works best for rifles with flat surfaces, such as many AR-15 platforms, allowing you to check that both the rifle and the scope are perfectly horizontal and vertical simultaneously. A primary advantage is the speed and ease of use; reading the bubble levels takes only seconds.
However, bubble levels depend on having flat, squared surfaces on the rifle to give a truly accurate reference. Some older or budget scopes may have reticles not perfectly squared to the turrets, which can introduce small errors. High-quality bubble levels usually cost between $20 to $50, and placing multiple levels, on the action and on the scope, helps achieve the best alignment.
Using a Plumb Bob for Vertical Reference
The plumb bob is a simple, traditional tool favored for its reliability in vertical referencing. To use it, hang the plumb bob from the ring or an appropriate point on the rifle scope so it dangles behind the stock. This hanging weight provides a true vertical line beyond the rifle itself. You then adjust the scope in the rings until the vertical stadia lines of your reticle line up with the string, ensuring the reticle is aligned straight with gravity.
For bolt-action rifles or those lacking flat surfaces on the receiver or rail, the plumb bob method remains the most precise way to square the reticle to the rifle. It costs just a few dollars for a plumb bob or can be improvised from a string and a small weight. The main drawback is the increased time and steadiness needed during the procedure, but the result tends to be very accurate.
Digital Levels and Angle Cubes
Digital inclinometer levels and angle cubes offer precise readings of angles, often displayed to tenths of a degree. These tools make leveling fast and accurate, especially beneficial for shooters wanting quick setup and repeatability. Many digital models allow for fine calibration and can be attached securely to the scope or rifle.
Digital levels typically cost between $30 and $100 depending on features like LCD screens, hold functions, and magnetic bases. Their accuracy and ease come at a higher price compared to bubble levels. Some opinions suggest digital or bubble levels alone might not guarantee perfect reticle squaring, so combining these with a plumb bob or confirming alignment visually is a good approach.
DIY Options and Budget Alternatives
You can create useful DIY leveling tools to save money while achieving good accuracy. For example, a homemade plumb bob can be made from a length of string and a small metal nut or washer. Mark one end to hang from the scope or rings, then use it to align your scope’s vertical crosshairs. The simplicity of this setup makes it accessible for most rifle owners.
Another budget choice is to use carpenter’s bubble levels, which cost around $5 to $15. These can be taped or magnetically attached to flat surfaces of the rifle or scope turret. While not designed expressly for firearms, they provide a reasonable level reference if used carefully. Whatever tool you choose, make sure the parts you attach it to are flat and stable to avoid errors during leveling.
Preparing Your Rifle and Workspace for Leveling
Choose a stable, flat surface to perform the leveling process. A solid bench or table outdoors or in a well-lit workshop works best. Avoid uneven ground or locations subject to vibrations or wind that could disturb the rifle. Proper lighting helps you see alignment marks and bubble levels clearly. Set up in a place free of dust and dirt to keep scope and rifle parts clean during mounting.
Cleaning the rifle and scope surfaces before starting ensures accurate measurements and alignment. Use a lint-free cloth and a mild solvent designed for firearms to wipe down the top of the rifle’s receiver and the bottom of the scope tube where the rings or mounts will attach. Removing oil, dirt, or debris reduces slipping and tilt. Clean the scope turret caps and ensure no grit blocks the adjustment mechanisms.
Stabilize the rifle horizontally before mounting the scope. Use a proper rifle rest or sandbags that support the forearm and buttstock without applying uneven pressure. Confirm the rifle’s alignment with a baseline level before beginning to mount or level the scope. This baseline helps prevent introducing canting errors during installation.
- Find a level work surface free of vibrations, dust, and wind
- Clean the rifle receiver and scope tube contact points thoroughly
- Use a stable rest or sandbags to support the rifle horizontally
- Verify the rifle is level using a bubble or digital level before mounting
- Ensure workspace lighting clearly shows the levels and adjustment marks
- Have all your leveling tools within reach to avoid moving the rifle unnecessarily
Double-check that the rifle remains perfectly level after mounting the scope and tightening the rings. Use a bubble level on the rifle’s receiver or barrel and the scope turret to confirm both stay aligned. Minor shifts can occur during tightening, so frequent verifications reduce the risk of crooked mounting. The whole setup should not wobble or roll when tested gently on the rest.
Workspace temperature and humidity generally do not affect the leveling process significantly but can impact the handling of lubricants and adhesives used in mounting. Room temperatures between 65°F and 75°F are ideal for working with metal components to avoid expansion or contraction. Avoid extreme cold or heat, which can affect the precision fit of mounts and screws. Taking these steps supports achieving accurate scope level and reliable, repeatable shot placement.
Step-by-Step Guide to Leveling a Rifle Scope
Leveling a rifle scope carefully ensures your crosshairs are perfectly aligned, which improves shot accuracy and consistency. The process starts with securing your rifle in a stable position, mounts the scope with loosely fitted rings, uses bubble levels to align the reticle, and finishes with tightening to specified torque settings. Adjusting eye relief during mounting guarantees a safe, comfortable sight picture.
Securing and Leveling the Rifle
Place your rifle securely in a rest, sandbag, or mechanical vice designed for firearms. The rifle itself must be perfectly level before starting, as any cant affects scope alignment. Place a bubble level on the rifle’s Picatinny rail, receiver, or scope base, choose the flattest surface for the most accurate reading. Adjust the rest or vice until the bubble is centered, indicating the rifle is level both front to back and side to side.
Confirm stability before mounting the scope. A firm setup prevents shifts that could throw off your leveling during installation.
Mounting Base Rings and Positioning the Scope
Start by loosely attaching your base rings to the rifle’s mount points using manufacturer-recommended screws. Do not fully tighten screws yet; this allows you to adjust the scope’s orientation. Place the scope into the rings without tightening the upper ring caps.
Adjust the horizontal position to achieve proper eye relief, which usually means positioning the eyepiece 3 to 4 inches from your eye when you shoulder the rifle. A proper eye relief ensures a full field of view without black rings and reduces the risk of scope bite. Once positioned comfortably, lightly torque the bottom ring screws enough to hold the scope without full locking.
Aligning the Reticle Using Levels
Attach a bubble level to the top turret cap of the scope. A small, low-profile level designed for scopes works best. Keep your rifle level and watch the level’s bubble as you slowly rotate the scope within the rings. Align the vertical and horizontal reticles by centering the bubble level. This step prevents canting, where crosshairs tilt and cause inconsistent shots, especially at longer ranges.
- Secure the rifle in the rest and verify it’s perfectly level with a bubble level on the rail.
- Loosely mount the base rings onto the rifle.
- Place the scope in the rings, adjust for eye relief, and finger-tighten the ring caps.
- Attach a bubble level to the scope’s turret or use a second level on the scope tube.
- Rotate the scope slowly until the bubble indicates the reticle is perfectly level.
- Hold the scope steady and begin gently tightening the ring screws evenly.
Keep monitoring the bubble level during screw tightening to ensure the scope doesn’t shift out of alignment.
Final Torque and Verification
Using a torque wrench, apply the manufacturer’s recommended torque settings to the ring screws, usually between 15 and 25 inch-pounds. Tighten screws in an alternating star pattern in small increments to evenly distribute pressure and prevent scope tube deformation.
After reaching proper torque, double-check the rifle and scope are still level. Remount the rifle in the rest, place the bubble level again on the rifle rail and scope turret. If the bubble moves from center, slightly loosen screws, realign, and retorque.
Verify eye relief and reticle level by shouldering the rifle and confirming a clear sight picture. This completes the process, providing a stable, level scope setup ready for accurate shooting.
Comparing the Bubble Level and Plumb Bob Methods
Both the bubble level and plumb bob methods can effectively level a rifle scope, with each offering different advantages depending on your rifle type, space, and precision needs. The bubble level is quicker and ideal for rifles with flat surfaces, while the plumb bob is versatile and simple but requires a bit more setup. Understanding their processes, accuracy, and time commitment makes it easier to pick the right one.
Bubble Level Method Overview
The bubble level method uses a small spirit level placed on a flat part of the rifle, usually the rifle’s action or scope base, to ensure the rifle itself is level. You then adjust the scope until the reticle is level relative to the rifle. This method relies on having a flat, consistent surface to place the bubble level.
To use it, first secure your rifle in a stable rest. Place a bubble level on the receiver or flat area near the scope rings and adjust the rifle until the bubble centers. Then, with the rifle stable, adjust the scope’s reticle to be perfectly vertical and horizontal using the scope’s turrets or by loosening and rotating the scope within the rings. This process usually takes about 5 to 10 minutes once you’re set up. Bubble levels range from around $10 to $30 for quality gun-specific models.
Accuracy depends on the level’s sensitivity, typically able to detect differences as small as 0.1 degrees. Errors come from uneven surfaces or shifting during adjustment. This method works best indoors or on benches with enough room to place a level properly.
Plumb Bob Method Overview
The plumb bob method uses gravity to define a true vertical reference, freeing you from relying on flat rifle surfaces. Tie a small weight on a string and hold or hang it near the rifle’s muzzle or scope. The string settles vertical, showing a reference line relative to the scope’s reticle.
Start by securing your rifle and hanging the plumb bob so the string hangs freely next to the scope’s reticle. Rotate the scope to align the vertical crosshair with the plumb bob’s line. This method doesn’t require flat surfaces and works in tighter spaces but takes a little more time to set up, about 10 to 15 minutes. A simple plumb bob can cost under $10 or be made from household items like a string and small weight.
Because gravity defines the vertical reference, accuracy can approach the bubble level method. However, drafts, movement of the string, or improper suspension can reduce precision. The plumb bob method works well outdoors or when your rifle lacks flat leveling surfaces.
Choosing the Best Method for Your Setup
Choosing between bubble levels and plumb bob methods depends on your rifle’s design, workspace, and accuracy needs. The bubble level method requires a flat surface and a steady, bench-rest environment. It is faster and offers direct feedback on rifle orientation but may not work well with rifles featuring rounded or irregular actions.
Plumb bob leveling is more versatile in these cases and effective even in less controlled environments. The tradeoff is that it demands a vertical drop space and more time to ensure the string is stable. If you often shoot in the field or do not have a flat surface on your rifle, the plumb bob method may suit you better. Below is a comparison table outlining key points of both methods to help you decide.
| Aspect | Bubble Level Method | Plumb Bob Method |
|---|---|---|
| Process | Place bubble level on flat rifle surface; adjust rifle then scope | Hang weighted string; align reticle with vertical string line |
| Accuracy | About 0.1° with quality levels; depends on flat contact surface | Comparable; depends on stable string and absence of wind |
| Time Required | 5, 10 minutes | 10, 15 minutes |
| Required Space | Bench or flat space to place level | Vertical drop space above or below rifle to hang plumb bob |
| Costs | $10, $30 for gun-specific bubble level | Under $10 or DIY with string and weight |
| Best Use Case | Rifles with flat surfaces, controlled bench environment | Rifles without flat surfaces, field or varied environments |
Consider what fits your equipment and shooting environment. For example, if you shoot precision target with a tactical rifle having a Picatinny rail, a bubble level might minimize setup time. Conversely, if you hunt with a scoped bolt-action without flat areas, try the plumb bob to get accurate leveling without extra tools.
Common Leveling Mistakes and How to Fix Them
One common mistake when leveling a rifle scope is uneven torque on the mounting screws. Applying inconsistent pressure can tilt the scope slightly, which distorts the reticle alignment. To fix this, use a torque wrench set to the manufacturer’s recommended values, often between 15 to 25 inch-pounds, depending on the rifle and scope. Tighten screws in an alternating pattern, gradually increasing torque to ensure even pressure without overtightening, which can damage both the scope tube and mounting rings.
An unstable rifle during the leveling process also affects accuracy. Securing the rifle firmly on a stable rest is essential; small movements can disrupt your reference point. Level the rifle first using a bubble level on the flat surfaces of the action or receiver before mounting and adjusting the scope. Avoid relying on uneven surfaces like a cluttered bench or an unlevel garage floor, since they introduce errors and make consistent leveling difficult.
Ignoring parallax adjustments while leveling will cause the reticle to shift when you move your head. Parallax error means the reticle appears to move relative to the target if the focus isn’t set correctly, which is critical to fix before finalizing scope alignment. Adjust the parallax knob or side focus to the estimated shooting distance to eliminate this issue, ensuring a crisp sight picture that won’t shift off-target with slight head movements.
- Use a torque wrench to tighten screws evenly at recommended inch-pound values.
- Secure the rifle on a stable rest or vise before leveling.
- Level the rifle action first, then the scope to ensure proper alignment.
- Adjust scope parallax to the target distance before final tightening.
- Avoid using distant visual references like telephone poles or fence posts as level guides.
- Check reticle straightness by looking through the scope at a level surface after mounting.
- When the reticle looks crooked after mounting, loosen it and remount the scope carefully, following the leveling steps.
Noticing a crooked reticle after mounting means you shouldn’t overtighten the screws to try fixing it. Loosen them slightly, re-level the scope using your tools and supports, then slowly retighten while checking the reticle alignment frequently. Overtightening can strip threads or cause stress fractures in the scope tube, making the problem worse. Repeated attempts without a level reticle call for consulting a licensed gunsmith to prevent equipment damage.
Maintaining Scope Level: When and How to Recheck
Check your rifle scope’s level every few shooting sessions or after any event that might jar or shock your rifle. A good rule of thumb is to reverify the level after shooting 100 to 200 rounds or anytime you transport your rifle over rough terrain. Changes can occur due to recoil impact, bumping the rifle during handling, or even shifting mounts from temperature fluctuations. Maintaining a level scope ensures your elevation and windage adjustments stay accurate and your bullet groups remain consistent.
Environmental factors like temperature swings from below freezing to above 90°F can affect scope mounting hardware. Aluminum and steel parts expand and contract differently, potentially causing your scope to shift slightly over time. High humidity or moisture exposure can also loosen mounting screws or create corrosion that shifts position. After outdoor hunts or long range sessions in varying climates, inspect your scope’s level before your next use to avoid unexpected accuracy issues.
Look for signs your scope has lost level such as persistent shot groups that drift horizontally despite adjusting elevation clicks, or reticle lines that visually appear tilted when the rifle is held naturally. When your bullet impacts consistently miss to one side, consider releveling your scope before changing ammo or adjusting for wind. Performing a quick check with your bubble level on the scope and rifle ring can help identify small misalignments that affect shot placement.
Repeated attempts to level your scope that do not produce a stable zero, or mounts that seem damaged or worn, make seeking professional gunsmith assistance advisable. A gunsmith can verify proper torque settings, check for bent components, and reinstall or replace your scope mounts as needed. Professional help typically costs between $50 and $150, depending on complexity, but saves time and ensures precision when DIY efforts stall.
Rechecking scope level is a simple process: place your rifle on a steady rest, level the rifle action using a bubble level, then carefully adjust the scope’s crosshairs so they align perfectly with the level. Tighten mounting screws incrementally, rechecking level after each adjustment. Fire a small group on target to verify point of impact stays consistent. Testing at this stage confirms the scope remains truly level. Use a known fixed setting, like a flat bench in your home, to minimize errors during your rechecks.
Always retest your point of impact on the target after each adjustment; leveling alone doesn’t guarantee zero until confirmed with live fire. Never rely solely on visual alignment without shooting to verify.
Step-by-Step Action Plan to Level Your Rifle Scope
Follow this practical plan to ensure your rifle scope is properly leveled for improved accuracy.
- Before mounting the scope: Clean your rifle’s mounting surfaces to ensure a secure fit; verify no dirt or debris remains.
- Day 1: Attach the scope rings loosely around the scope; this allows for adjustments while keeping the scope stable.
- Day 2: Place your rifle on a solid rest or vise; make sure the rifle is stable and won’t move during the leveling process.
- Day 3: Use a bubble level on the rifle’s receiver to establish a baseline; the bubble should center consistently.
- Day 4: Position your bubble level on top of the scope turret or use a plumb bob aligned with the reticle; adjust the scope until level.
- Day 5: Tighten the scope rings incrementally while rechecking the bubble level to prevent shifting; the level reading should stay steady.
- After one week of shooting: Recheck the scope level to confirm it holds after recoil and handling; readjust if necessary.
- After a month of regular use: Perform a final level check before any precision shooting session; accuracy depends on consistent scope alignment.
Frequently Asked Questions
How Long Does It Take to Level a Rifle Scope Properly?
It typically takes about 10 to 15 minutes to level a rifle scope correctly. Taking this time ensures your scope is aligned precisely with the bore axis for better accuracy.
Can I Level a Rifle Scope Without Specialized Tools Like a Bubble Level?
You can use the plumb bob method to level a rifle scope without specialized tools. It requires a stable setup and an empty action but may be less precise than a bubble level.
What Should I Do If My Shooting Bench or Surface Isn’t Level?
Ensure the rifle is level by using a portable level or leveling tool even if the bench isn’t level. This prevents a tilted scope alignment for more accurate shooting.
How Do I Confirm My Scope Stayed Level After Mounting?
After mounting the scope, check both the rifle and scope with a bubble or digital level again. This final check confirms neither shifted during the mounting process.
Is It Possible to Level a Scope While the Rifle Is Mounted and in the Shooting Position?
Leveling the scope while the rifle is in the shooting position helps ensure it stays aligned during firing. Using a level on the turret while the rifle is supported helps maintain accuracy.
What Is the Risk of Not Having a Level Rifle Scope When Shooting at Long Distances?
An unleveled scope causes canting errors, leading to missed shots and inconsistent groupings. This effect grows more pronounced at longer ranges due to trajectory misalignment.
Wrapping Up
Achieving a properly leveled rifle scope takes patience and exactness, but the reward is noticeable accuracy improvements. Start by carefully setting your rifle on a stable rest and precisely aligning your scope with a reliable level tool. Regular checks keep your setup consistent and reliable. Begin your next range session by confirming your scope’s level to shoot with confidence and consistency.